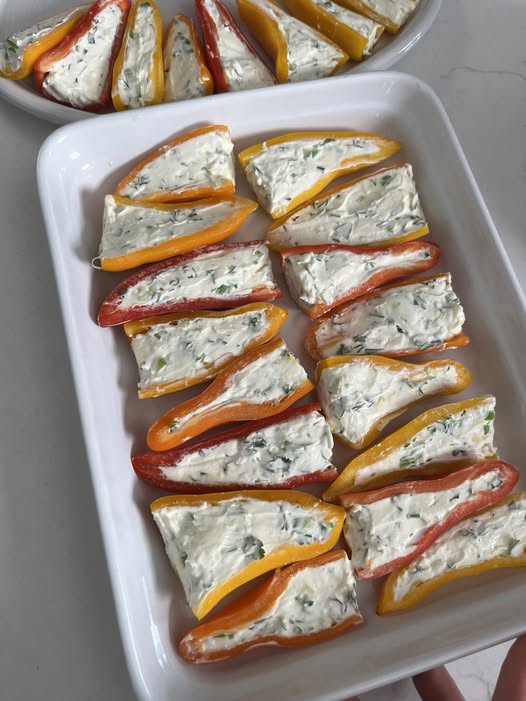
If you are looking for the ultimate “handheld” appetizer that packs a punch of color and a symphony of textures, look no further than these Mini Pepper Poppers. Unlike their larger cousins, the jalapeño poppers, which can sometimes be a gamble with heat, these mini sweet peppers offer a delightful, mild crunch that lets the savory filling truly shine. They are bright, festive, and—most importantly—absolute crowd-pleasers.
The magic of this recipe lies in the contrast: the snap of the fresh pepper, the velvety richness of the whipped cream cheese, and the smoky, salty crunch of crispy bacon bits. We add a hint of garlic and a touch of sharp cheddar to ensure every bite is deeply savory. Whether you’re setting them out for a game day spread, a holiday party, or a summer barbecue, these little gems are always the first to disappear. They are as beautiful as they are addictive, bringing a pop of garden-fresh vibrance to any table.
Ingredients
- 1 lb (450g) Mini Sweet Peppers: Look for a bag with a mix of red, orange, and yellow.
- 8 oz (225g) Cream Cheese: Softened to room temperature for easy mixing.
- 1 cup Sharp Cheddar Cheese: Freshly shredded.
- 6 slices Thick-Cut Bacon: Cooked until very crispy and finely crumbled.
- 2 Green Onions: Finely sliced (whites and greens).
- 1/2 tsp Garlic Powder: For a savory baseline.
- 1/4 tsp Smoked Paprika: To enhance the bacon’s smokiness.
- 1/4 tsp Black Pepper: Freshly cracked.
- Fresh Chives or Cilantro: For a finishing garnish.
- Optional: A pinch of red pepper flakes if you want a subtle “sting.”
Equipment Needed
- Baking Sheet: Lined with parchment paper or a silicone mat for easy cleanup.
- Medium Mixing Bowl: To combine the filling.
- Paring Knife: For prepping the peppers.
- Small Spoon or Piping Bag: To fill the peppers.
Time and Servings
- Prep Time: 20 minutes
- Cooking Time: 10–12 minutes
- Total Time: Approx. 35 minutes
- Servings: Makes about 20–24 poppers
Step-by-Step Instructions
1. Prep the Peppers
Preheat your oven to 400°F. Wash the mini peppers and pat them dry. Slice each pepper in half lengthwise. Use a small spoon or your fingers to gently remove the seeds and the white ribs. Pro Tip: Keep the green stems attached! They act as a natural “handle” for your guests and make the presentation look professional.
2. Make the Filling
In a medium mixing bowl, combine the softened cream cheese, shredded cheddar, garlic powder, smoked paprika, and black pepper. Use a sturdy spoon or a hand mixer to whip them together until smooth and fluffy.
3. Add the “Crunch”
Fold in the crumbled bacon bits and the sliced green onions. Reserve a tablespoon of the bacon for topping at the end to give them a polished look.
4. Stuff the Peppers
Using a small spoon (or a piping bag if you want to be extra fancy), fill each pepper half with the cream cheese mixture. You want the filling to be flush with the top of the pepper or slightly mounded—don’t overfill, or the cheese will run out as it melts.
5. The Bake
Arrange the stuffed peppers in a single layer on your prepared baking sheet. Place them in the oven and bake for 10–12 minutes. You are looking for the peppers to be slightly tender (but still holding their shape) and the cheese filling to be hot and beginning to turn golden on top.
6. The Broil (Optional)
If you like a bit of char, turn your broiler to high for the last 60 seconds of cooking. Watch them closely—they can go from perfect to burnt in a heartbeat!
7. Garnish and Serve
Remove from the oven and let them cool for 5 minutes (the cheese is molten lava right now!). Sprinkle with the reserved bacon bits and fresh chives. Serve warm or at room temperature.
Tips and Tricks
- Softened Cheese is Key: Trying to mix cold cream cheese is a recipe for frustration. Leave the block on the counter for at least an hour before starting.
- Bacon Consistency: Make sure your bacon is truly crispy. If it’s chewy, it will be difficult to bite through the popper cleanly.
- The Piping Bag Trick: If you are making a large batch, put the filling into a gallon-sized Ziploc bag and snip off the corner. You can “pipe” the filling into the peppers in half the time it takes to use a spoon.
- Make-Ahead Magic: You can stuff these peppers up to 24 hours in advance. Keep them covered in the fridge and simply pop them in the oven when your guests arrive.
Variations
- The Spicy Popper: If you miss the heat of a jalapeño, add a teaspoon of hot sauce or a finely diced habanero to the cream cheese mixture.
- The “Everything” Popper: Sprinkle the tops with “Everything Bagel Seasoning” before baking for a savory, seedy crunch.
- Vegetarian Version: Omit the bacon and add 1/4 cup of finely chopped sun-dried tomatoes or smoked gouda cheese for a similar depth of flavor.
- Taco Style: Use Mexican blend cheese and add a teaspoon of taco seasoning to the filling. Top with a tiny dollop of salsa after baking.
Serving Suggestions
These are the perfect companion to a cold Mexican lager or a crisp Sauvignon Blanc. They sit beautifully on an appetizer platter alongside celery sticks and blue cheese dip. If you’re serving them as part of a larger meal, they act as a fantastic, colorful side for grilled steaks or blackened chicken.
Storage Instructions
- Refrigerator: Store any leftovers in an airtight container for up to 3 days.
- Reheating: Reheat in a 350°F oven for 5 minutes to maintain the pepper’s crunch. Microwaving is not recommended as it makes the peppers soggy and the cheese oily.
- Freezing: I do not recommend freezing these, as the fresh peppers will lose their structural integrity and become watery when thawed.
Nutritional Information (Per 2 Poppers)
- Calories: 140 kcal
- Total Fat: 11g
- Carbohydrates: 4g
- Protein: 6g
- Sodium: 210mg
- Fiber: 1g
Conclusion
Mini Pepper Poppers are the ultimate proof that great things come in small packages. They offer all the indulgence of a classic bar snack but with a fresh, vibrant twist that feels elevated. Between the creamy center and the smoky bacon, it’s impossible to stop at just one. Whip up a batch for your next gathering and watch your guests’ faces light up with the first crunch. Happy snacking!