Introduction
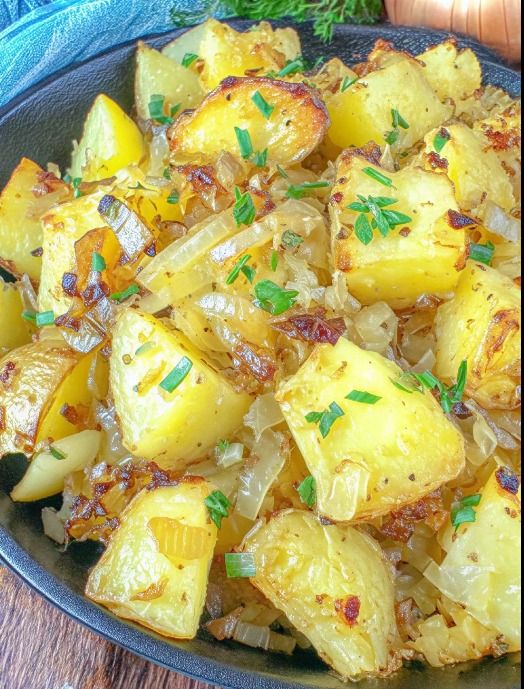
There is no side dish quite as versatile or nostalgic as a pan of Fried Potatoes and Onions. This is the quintessential homestyle comfort food—equally at home next to a stack of breakfast pancakes, a lunchtime burger, or a hearty dinner roast. The magic lies in the contrast: the potatoes develop a salty, shattered-glass exterior while remaining buttery and soft inside, all intertwined with ribbons of onions that have been sautéed until they are sweet and caramelized. This recipe relies on a few simple techniques—like the “Starch-Purge”—to ensure your potatoes get truly crispy in the skillet rather than just steaming. It’s a reliable, one-pan masterpiece that tastes like a Sunday morning in a cast-iron skillet.
Ingredients
The Foundation
- 3 lbs Yukon Gold or Russet Potatoes: (Yukon Golds are creamier; Russets get slightly crispier).
- 2 large Yellow Onions: Sliced into thin half-moons.
- 3 tbsp Neutral Oil: (Vegetable or Canola) for a high smoke point.
- 2 tbsp Unsalted Butter: For that essential rich flavor and better browning.
The Seasoning
- 1 tsp Kosher Salt: (Adjust to taste).
- 1/2 tsp Coarse Black Pepper
- 1/2 tsp Garlic Powder: (Optional, for extra depth).
- 1/2 tsp Smoked Paprika: (Optional, for a hint of color and woodsy flavor).
Equipment Needed
- 12-inch Cast Iron Skillet: (Or a heavy-bottomed non-stick skillet).
- Large Mixing Bowl: For the starch-purge soak.
- Paper Towels or Clean Kitchen Towel: To dry the potatoes thoroughly.
- Sturdy Spatula: For flipping and scraping up the “fond.”
Preparation Time, Cooking Time, Total Time, Servings
- Prep Time: 15 minutes (plus 15 mins soaking)
- Cook Time: 25 to 30 minutes
- Total Time: Approx. 1 hour
- Servings: 6 people
Step-by-Step Instructions
1. The “Starch-Purge” (Secret Step)
Peel the potatoes (or leave skins on for a rustic look) and slice them into 1/4-inch thick rounds or cubes. Place them in a large bowl of cold water for at least 15 minutes. This draws out the excess starch that causes potatoes to stick together and get gummy.
2. Dry Them Bone-Dry
Drain the potatoes and spread them out on paper towels or a clean kitchen towel. Pat them until they are completely dry. Any moisture left on the potatoes will create steam in the pan, preventing them from getting that golden-brown crunch.
3. The Initial Sear
In your large skillet, heat the oil and butter over medium-high heat until the butter is foaming. Add the potatoes in an even layer (it’s okay if they overlap slightly, but don’t overcrowd too much). Let them sit undisturbed for 5–7 minutes. You want to hear a vigorous sizzle as the bottom layer develops a deep golden crust.
4. Add the Onions
Flip the potatoes carefully. Scatter the sliced onions over the top. Now, turn the heat down to medium. The onions will release moisture as they cook, which helps tenderize the centers of the potatoes while the bottoms continue to crisp.
5. The “Lid-Steam” (Optional)
If you like your potatoes extra tender inside, cover the skillet with a lid for about 5 minutes during this middle stage. This traps a bit of steam to finish the cooking process. Remove the lid for the final 10 minutes to re-crisp.
6. Season and Finish
Once the potatoes are tender and the onions are golden and translucent, sprinkle the salt, pepper, garlic powder, and paprika over the pan. Toss everything together one last time to coat. Cook for another 2–3 minutes until everything is aromatic and perfectly browned.
Tips and Tricks
- Cast Iron is King: A well-seasoned cast iron skillet holds heat better than any other pan, which is essential for that “diner-style” crust.
- Don’t Over-Stir: The biggest mistake is flipping the potatoes too often. Let them sit and develop a crust before you move them.
- Fat Matters: The combination of oil and butter is intentional—the oil prevents the butter from burning at high heat, while the butter provides the flavor.
- Onion Timing: If you add the onions at the very beginning, they might burn before the potatoes are done. Adding them halfway through ensures they caramelize perfectly.
Variations
- Cheesy Skillet Potatoes: Sprinkle a cup of shredded cheddar over the top during the last 2 minutes of cooking and cover with a lid until melted.
- Bacon Fried Potatoes: Sauté 4 slices of chopped bacon in the skillet first. Remove the bacon but keep the fat in the pan to fry the potatoes. Stir the bacon back in at the end.
- Peppers and Onions: Add sliced red or green bell peppers along with the onions for a “Home Fries” vibe.
Serving Suggestions
These potatoes are the perfect partner for over-easy eggs, crispy bacon, or a juicy steak. They also work beautifully as a side for meatloaf or fried chicken. For a bit of brightness, serve with a side of ketchup or a dollop of sour cream and chives.
Storage Instructions
- Refrigeration: Store in an airtight container for up to 3 days.
- Reheating: For the best results, reheat them in a skillet over medium heat with a tiny bit of butter to bring back the crunch. Avoid the microwave if possible, as it will make them soft.
Nutritional Information (Per Serving)
- Calories: 240 kcal
- Protein: 4g
- Fat: 12g
- Carbohydrates: 30g
- Sodium: 410mg
- Fiber: 4g
Conclusion
Mom’s Classic Fried Potatoes and Onions is a recipe that proves you don’t need fancy ingredients to make a memorable meal. It’s about patience, high heat, and the simple joy of a well-browned potato. Whether you’re making a big breakfast for the family or a quick weeknight side, this dish is a guaranteed crowd-pleaser. Enjoy!