Introduction
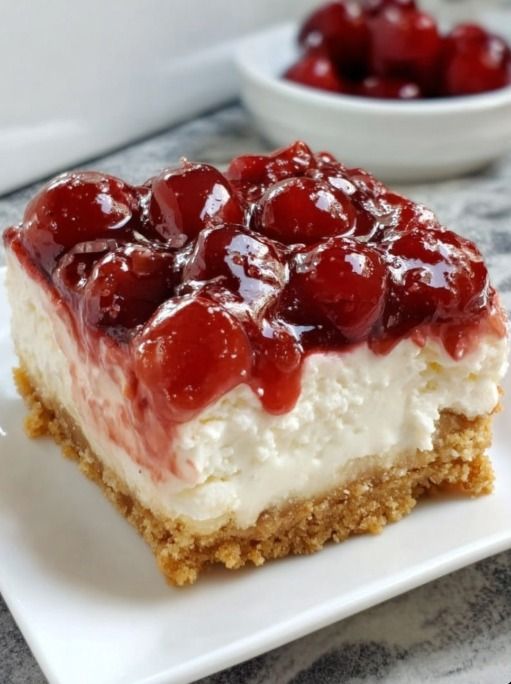
Cherry Cheesecake Bars are the perfect balance of a buttery, golden crust, a rich and creamy center, and a vibrant fruit topping. While a full cheesecake can be intimidating, these bars are incredibly forgiving and much easier to slice and transport for a potluck or family gathering.
The ruby-red cherry topping makes these especially popular for holidays, summer picnics, or any time you want a dessert that looks as good as it tastes.
Ingredients
The Graham Cracker Crust
- 1 1/2 cups Graham Cracker Crumbs
- 1/4 cup Granulated Sugar
- 6 tablespoons Unsalted Butter, melted
The Creamy Cheesecake Layer
- 16 oz (2 blocks) Cream Cheese, softened to room temperature
- 1/2 cup Granulated Sugar
- 2 Large Eggs
- 1 teaspoon Pure Vanilla Extract
- 1/4 cup Sour Cream (for extra silkiness)
The Fruit Topping
- 1 can (21 oz) Cherry Pie Filling
Equipment Needed
- 8×8 inch or 9×9 inch Baking Pan: Lined with parchment paper.
- Electric Hand Mixer: For a smooth, lump-free filling.
- Large Mixing Bowl: For the crust and filling.
Time & Servings
- Prep Time: 15 minutes
- Bake Time: 35–40 minutes
- Chill Time: At least 4 hours (overnight is best)
- Total Time: ~5 hours
- Servings: 12 to 16 bars
Step-by-Step Instructions
1. Preheat and Prep
Preheat your oven to 325°F (160°C). Line your baking pan with parchment paper, leaving an overhang on two sides to act as “handles” for lifting the bars out later.
2. Press the Crust
In a medium bowl, combine the graham cracker crumbs, sugar, and melted butter. Stir until it looks like wet sand. Press the mixture firmly into the bottom of the pan. Bake for 8–10 minutes, then remove and let cool slightly while you make the filling.
3. Beat the Filling
In a large bowl, beat the softened cream cheese and sugar together until completely smooth. Add the eggs one at a time, beating on low speed just until combined. Stir in the vanilla and sour cream.
4. Bake the Cheesecake
Pour the cheesecake batter over the crust and spread it evenly. Bake for 30–35 minutes. The edges should be set, but the center should still have a slight jiggle.
5. Cool and Top
Let the cheesecake cool at room temperature for about 30 minutes. Once cooled, spread the cherry pie filling evenly over the top.
6. The Big Chill
Cover the pan and refrigerate for at least 4 hours. This step is crucial; the bars need time to firm up so they can be sliced cleanly.
Tips and Tricks
- Temperature Matters: Make sure your cream cheese is truly at room temperature. Cold cream cheese leads to a lumpy batter that is hard to smooth out.
- Clean Cuts: For perfect squares, lift the chilled cheesecake out of the pan using the parchment handles. Wipe your knife with a warm, damp cloth between every single cut.
- Custom Crust: If you want a deeper flavor, swap the graham crackers for crushed Grandma’s Classic Chocolate Crispy Bars or chocolate wafer cookies.
Variations
- Chocolate Cherry: Drizzle melted dark chocolate over the cherry topping before serving.
- Almond Twist: Add 1/2 teaspoon of almond extract to the cheesecake batter—almond and cherry are a match made in heaven.
- Fresh Fruit: If you prefer less sweetness, use fresh pitted cherries simmered with a little sugar and cornstarch instead of canned pie filling.
Storage Instructions
- Refrigeration: These bars must stay chilled. Store them in an airtight container in the fridge for up to 5 days.
- Freezing: You can freeze these bars! Wrap them tightly in plastic wrap and foil for up to 2 months. Thaw in the refrigerator before serving.
Conclusion
Cherry Cheesecake Bars are a timeless addition to any baker’s repertoire. They offer all the decadence of a luxury dessert with the convenience of a finger food.
Are you making these for a specific holiday celebration, or just as a sweet weekend treat?