Introduction
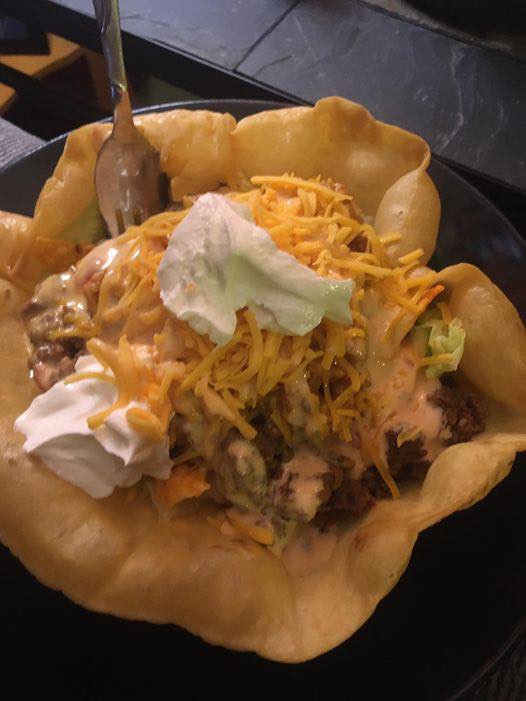
The absolute best part of a restaurant taco salad is cracking into that giant, bubbly, golden tortilla bowl. Trying to recreate that at home can feel intimidating if you think you need a commercial deep fryer or an expensive metal mold—but you don’t.
The master secret to making perfect, crispy, restaurant-quality taco salad bowls at home is utilizing standard oven-safe glass bowls and your oven. By draping large flour tortillas over inverted oven-safe bowls and baking them at high heat, you get a beautifully crinkled, shatteringly crisp taco shell that holds its shape perfectly without a drop of frying oil.
Ingredients
- The Crispy Edible Bowls:
- 4 large (10 or 12-inch) Burrito-Sized Flour Tortillas
- Vegetable Oil or Cooking Spray
- The Seasoned Beef:
- 1 lb Ground Beef (80/20 or 85/15)
- 1 packet (1 oz) Taco Seasoning
- ⅓ cup Water
- The Crisp Salad Base:
- 1 large head Iceberg Lettuce, shredded (about 5–6 cups)
- 1 cup Canned Black Beans, rinsed and drained
- 1 cup Canned Sweet Corn, drained
- 1 cup Cherry Tomatoes, halved
- The Loaded Toppings:
- 1 cup Sharp Cheddar or Mexican Blend Cheese, freshly shredded
- ½ cup Sour Cream
- ½ cup Store-Bought or Fresh Salsa
- 1 large Avocado, diced (or a scoop of fresh guacamole)
- Optional: Sliced jalapeños and chopped fresh cilantro
Equipment Needed
- Large Baking Sheet.
- 4 Oven-Safe Glass Bowls: Such as standard Pyrex mixing bowls or oven-safe ceramic bowls (to use as molds).
- Large Skillet: For browning the beef.
Time & Servings
- Prep Time: 15 minutes
- Bake/Cook Time: 15 minutes
- Total Time: ~30 minutes
- Servings: Makes 4 large loaded taco salads
Step-by-Step Instructions
1. Preheat and Prep the Shell Molds
Preheat your oven to 375°F (190°C). Take a large baking sheet and place your four oven-safe bowls upside down on the pan. Lightly spray the outside bottoms and sides of the bowls with non-stick cooking spray.
2. Shape and Bake the Crispy Shells
The Pliable Trick: Microwave your large flour tortillas for 10–15 seconds so they are warm and flexible.
Lightly brush or spray both sides of each tortilla with a little vegetable oil. Drape one tortilla over the bottom of each inverted bowl, pressing gently around the sides so it forms loose, decorative pleats and folds. Bake for 10–12 minutes until the tortillas are completely stiff, bubbly, and a beautiful golden brown. Let them cool on the bowls for 5 minutes; they will crisp up even more as they cool!
3. Cook the Taco Meat
While the shells are baking, heat a large skillet over medium-high heat. Add the ground beef and cook for 5–6 minutes, breaking it apart with a spatula, until fully browned. Drain any excess grease. Stir in the taco seasoning and ⅓ cup of water. Simmer for 2–3 minutes until the sauce reduces and thickly coats the beef. Remove from heat.
4. Build the Salad Base
Carefully lift the cooled, crispy tortilla shells off the glass molds and flip them right side up on your serving plates. Divide the shredded iceberg lettuce evenly among the four bowls. Top the lettuce with a generous scoop of black beans and sweet corn.
5. Load It Up
Add a warm scoop of the seasoned ground beef directly over the lettuce and beans.
Top immediately with the shredded cheddar cheese so it begins to melt slightly against the warm meat.
6. The Final Garnishes
Finish each bowl with cherry tomatoes, diced avocado, a dollop of sour cream, and a generous spoonful of salsa. Garnish with fresh cilantro or jalapeños if you like a kick. Serve immediately while the shells are crunchy and the beef is warm!
Tips and Tricks
- The Bowl Size: Standard 1-quart glass mixing bowls are the perfect size for a 10-inch burrito tortilla. If your tortillas are smaller (taco size), you can use a greased 12-cup muffin tin inverted, pressing the small tortillas into the gaps between the cups to make mini taco cups!
- Keep it Crisp: To avoid a soggy bottom, make sure your black beans and corn are thoroughly drained of their packing juices before adding them to the salad.
- The Dressing Secret: While salsa and sour cream act as a fantastic natural dressing, you can whisk together equal parts ranch dressing and your favorite salsa to create a quick, creamy “Santa Fe” taco dressing to drizzle over the top.
Variations
- The Creamy Fiesta Swap: Skip the standard cheddar and drizzle a warm, molten layer of queso dip right over the beef before adding the veggies, similar to the method used in Loaded Cheesy Pocket Tacos.
- Fajita Chicken Style: Swap the ground beef for strips of chicken breast sautéed with sliced bell peppers and onions tossed in fajita seasoning.
- Low-Carb Solution: If you are watching carbs, completely skip the tortilla shell step and layer these exact ingredients into a regular bowl over a base of shredded lettuce or cauliflower rice for an incredible keto taco bowl.
Storage Instructions
- Assemble Fresh: Taco salads do not travel or store well once fully assembled with the hot meat and cold produce.
- Prep-Ahead Strategy: You can bake the tortilla shells up to 2 days in advance and store them in a large gallon Ziploc bag at room temperature so they stay perfectly crunchy. Cook the meat and chop the veggies ahead of time, then simply reheat the beef and assemble right before dinner time!
Conclusion
These Homemade Taco Salad Bowls deliver that ultimate, spectacular restaurant-style crunch right in the comfort of your own kitchen—without dealing with a messy pot of frying oil. It’s an incredibly fun, interactive dinner that turns a simple salad into pure comfort food.
Are you looking to make these for a fun theme-night family dinner, or are you looking for some more fresh, crunchy Mexican-inspired recipes to try?